Installation of open cell suspended ceilings

/ EQUIPMENT AND INSTALLATION

Calculation of the configuration and installation instructions for open cell ceilings grilyato

You can calculate the complete set of KRAFT grilyato suspended ceilings by yourself with the help of the tables below. The complete set and installation instructions for the classic and pyramidal grilyato are combined in one section - they are identical. The complete set and installation instructions for the GLK grilyato are in a separate section. The completeness of grilyato "blinds" should be calculated by a specialist, based on the dimensions of the cells. You can also contact our specialists, who will advise and carry out a detailed calculation of the configuration.

Completeness and installation of classic and pyramidal grilyato

Calculation of components for 1 sq. m of a ceiling from a classic and pyramidal grilyato

Name / Size of the cell, mm
Unit measurement
50х50
60х60
75х75
86х86
100х100
120х120
150х150
200х200
Grilyato module 600x600 mm
pcs
2,78
2,78
2,78
2,78
2,78
2,78
2,78
2,78
Including:
Bottom profile 600 mm
pcs
30,58
25,02
19,46
16,68
13,9
11,12
8,34
5,56
Top profile 600 mm
pcs
30,58
25,02
19,46
16,68
13,9
11,12
8,34
5,56
Main profile grilyato 2400 mm
pcs
0,7
0,7
0,7
0,7
0,7
0,7
0,7
0,7
Longitudinal profile grilyato 600 mm
pcs
2,78
2,78
2,78
2,78
2,78
2,78
2,78
2,78
Connecting element
pcs
0,7
0,7
0,7
0,7
0,7
0,7
0,7
0,7
Grilyato suspension, step 1000 mm
set
1,68
1,68
1,68
1,68
1,68
1,68
1,68
1,68
Wall-mounted L-profile 3000 mm
pcs
≈ 0,216
An accurate calculation of the wall L-profile is recommended if you know the perimeter of the room

Installation instructions for classic and pyramidal grilyato

Technological map of the installation of the open cell ceiling classic grilyato
Image
Technological map of the installation of the open cell ceiling piramydal grilyato
Image
Installation instructions for KRAFT triangle open cell ceiling: two options
Image
Installation instructions for KRAFT open cell ceiling (classic and pyramidal)
Installation instructions for KRAFT triangle open cell ceiling
Instructions for self-installation of a classic or pyramidal open-cell ceiling
Complete set of open cell suspended ceiling classic and pyramidal open-cell ceiling
  1. Grilyato main profile 2400 mm long
  2. Grilyato module (consists of bottom and top profiles with a length of 600 mm)
  3. Grilyato longitudinal profile, length 600 mm
  4. Wall-mounted L-profile, length 3000 mm
  5. Grilyato suspension
  6. Connecting piece for basic profiles with a length of 2400 mm
Installation scheme of the classic open-cell ceiling
Installation scheme of the piramydal open-cell ceiling

01

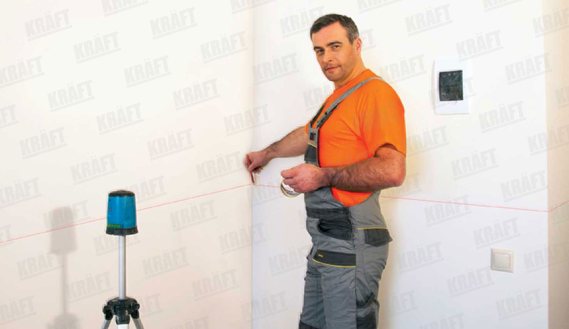
Marking of the ceiling
The level (horizontal) on which the suspended ceiling will be located is determined and the marking for the wall L-profile is made. The distance from the suspended ceiling to the main one should be at least 150 mm.
Image

02

Installation of wall L-profile
The wall L-profile (corner) is installed using dowels. The distance between the dowels is 300-500 mm.
Image

03

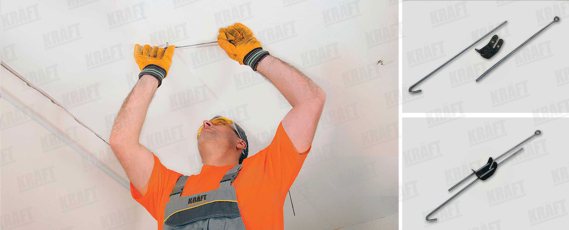
Marking and installation of suspensions for the main profile of 2400 mm
Suspensions are attached to the main ceiling using anchor dowels with a step of 800-1000 mm. The suspensions closest to the wall should be attached at a distance of no more than 600 mm from the wall.
Image

04

Installation of the frame from main profiles 2400 mm and longitudinal profiles 600 mm
We fasten the main profiles to the suspensions and connect them with each other using connectors. We install longitudinal profiles between the main ones.
Image

05

Assembly and installation of grilyato cassettes
We fasten the main profiles to the suspensions and connect them with each other using connectors. We install longitudinal profiles between the main ones.
Image
Caution!
Installation can be done in different sequences - decide at your own discretion:
– First mount the frame (step 4) in the entire room, and then proceed to the installation of grilyato cassettes (step 5).
or:
– Assemble part of the frame (step 4) and immediately install grilyato cassettes on the assembled area (step 5). Then proceed to the installation of the next part of the frame, etc.

Completeness and installation of cassette grilyato GLK

Calculation of components for 1 sq. m of a ceiling from a cassette grilyato GLK 15/15

Name / Size of the cell, mm
Unit measurement
50х50
60х60
75х75
86х86
100х100
120х120
150х150
200х200
Grilyato GLK module 600х600 мм
pcs
2,78
2,78
2,78
2,78
2,78
2,78
2,78
2,78
Including:
Bottom profile 600 mm
pcs
30,58
25,02
19,46
16,68
13,9
11,12
8,34
5,56
Top profile 600 mm
pcs
30,58
25,02
19,46
16,68
13,9
11,12
8,34
5,56
Framing profile
pcs
11,12
11,12
11,12
11,12
11,12
11,12
11,12
11,12
Main profile T-15 3600 mm
pcs
0,464
0,464
0,464
0,464
0,232
0,232
0,232
0,232
Longitudinal profile T-15 1200 mm
pcs
1,4
1,4
1,4
1,4
Cross profile T-15 600 mm
pcs
2,8
2,8
2,8
2,8
1,4
1,4
1,4
1,4
Grilyato suspension GLK, step 1000 mm
set
1,4
1,4
1,4
1,4
0,7
0,7
0,7
0,7
Wall-mounted L-profile 3000 mm
pcs
≈ 0,216
An accurate calculation of the wall L-profile is recommended if you know perimeter of the room

Installation instructions for cassette grilyato GLK 15/15

Installation of the open cell ceiling grilyato GLK is mounted on the frame with T-profiles KRAFT Fortis T-15. Grilyato cassettes GLK are inserted into the frame made of T-profiles instead of stele plates. In this section, we can only see the special features of the installation of grilyato GLK 15/15.
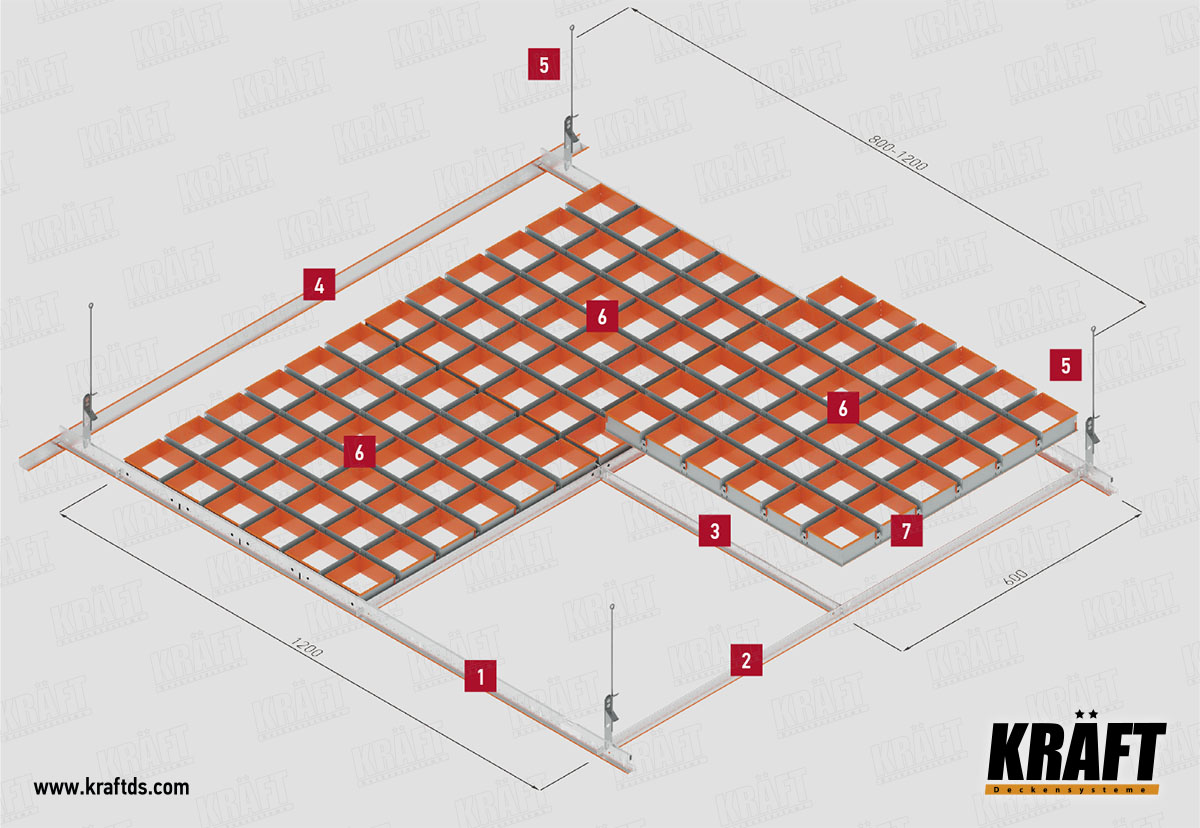
Complete set of open cell suspended ceiling grilyato GLK (cassette)
  1. Main T-profile 3600 mm long. 
  2. Transverse T-profile 1200 mm long. 
  3. Longitudinal T-profile 600 mm long. 
  4. Wall-mounted L-profile, 3000 mm long. 
  5. Suspension grilyato GLK. 
  6. Grilyato module (consists of upper and lower profiles 600 mm long). 
  7. Framing profile of the GLK grilyato module.
Technological card of the installation grilyato GLK 15/15
Image
Features of mounting grilyato GLK 15/15
This image for Image Layouts addon

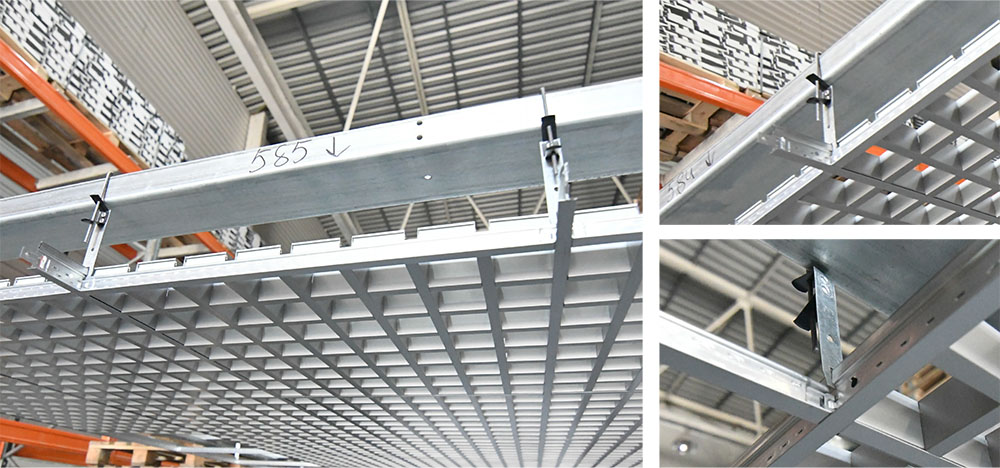
Use special suspensions

To fasten the frame from the T-profile, use special hangers. Installation of suspensions should be carried out at the intersection of T-profiles so that suspensions do not interfere with the installation of GLK grilyato cassettes.
This image for Image Layouts addon

Check the locks of the upper and lower profiles

After assembling the cassette, it is necessary to check that the locks of the top and lower grilyato profiles are fully engaged. To do this, squeeze the bottom profile (“mother”) on both sides of the lock with a little effort. If the lock was not closed, then you will hear a characteristic click and the profile will fall into place. In a properly assembled GLK grilyato cassette there should be no visible gaps between the profiles.
This image for Image Layouts addon

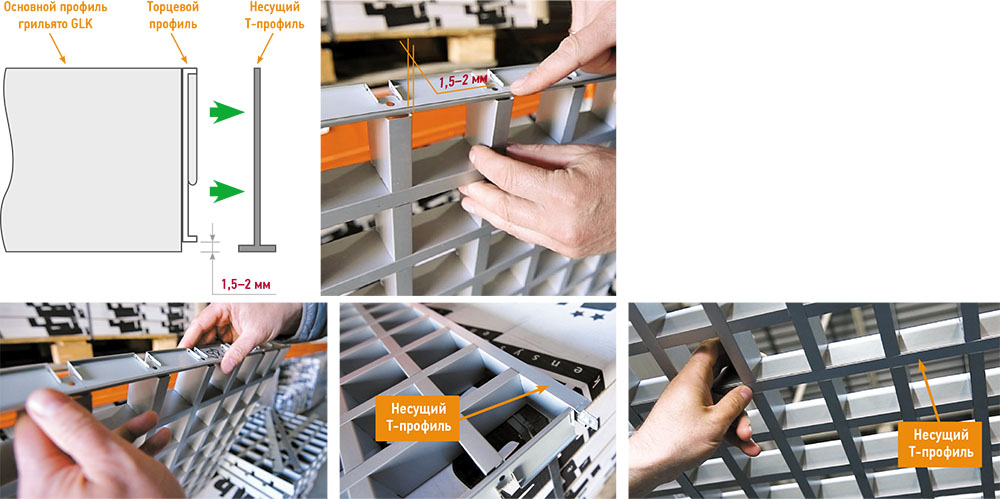
Check the locks of framing profile

The next step is to check the correct fastening of the framing profile locks. If the lock is closed correctly, then the main profile should protrude 1.5-2 mm beyond the framing one. This gap is necessary to compensate for the thickness of the T-profile. The framing profile rests on the bearing T-profile and the grilyato plane is flush with the plane of the bearing T-profile.
This image for Image Layouts addon

Make sure the cassette is properly secured

The grilyato cassette should rest against the T-profile and stand on the "spacer" of the supporting structure. The cassette has a slight backlash, so after installation it is enough just to move it a little until the trotz profile hits the seats. A small gap between the cassette and the T-profile is permissible at the joints of the transverse T-profiles, since the 600 mm profiles have a stamped lock.
This image for Image Layouts addon

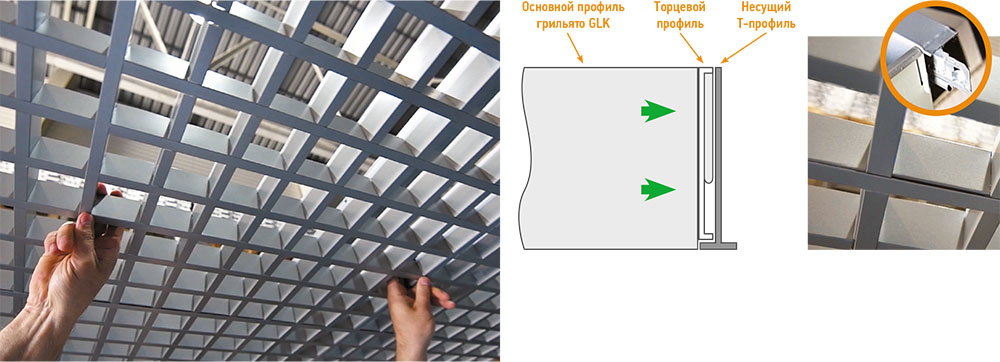
Check the correct position of the cassettes

To create a one-piece effect, all grilyato cassettes must be aligned towards the bottom grilyato profile (mama). All lower grilyato profiles should be directed parallel to the supporting T-profile
Image
Manufacturer of suspended ceilings